No need to scratch your head, I have worked with VPS for a very long time — I am sure this guide will fix all your problems. I will be using Cloudpanel to add wordpress site, you can also add multiple wordpress sites there very easily.
Things I have used in this guide:
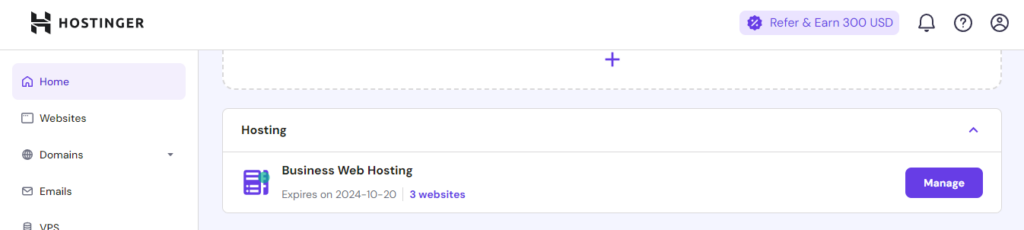
Hosting: KVM2 Plan (Hostinger)
OS: Ubuntu 24.04
Panel: CloudPanel
This guide consists of 11 steps:
- Make the website’s backup copy of Files and Database (in Shared/Business Web Hosting)
- Delete the website
- Setup your vps environment (in VPS Hosting)
- Setup the cloudpanel
- Add a new wordpress site in Cloudpanel
- Make dns connection
- Add a ssl
- Now your WordPress Sample Website will show
- Upload files
- Upload database
- Make connection with database
- 1. Backup Your Files & Database of Website (In Shared/Business Web Hosting)
- 2. Delete the Website
- 3. Setup Your VPS Environment (In VPS Hosting)
- 4. Setup the CloudPanel
- 5. Add a New WordPress Site in CloudPanel
- 6. Make DNS Connection
- 7. Add a SSL
- 8. A WordPress Sample will show on Website
- 9. Upload Files
- 10. Upload Database
- 11. Make Connection with Database
- Hurray! Your website is live now!
- Final Step: HOW TO SETUP EMAILS?
- Take Backup of VPS WordPress Site
1. Backup Your Files & Database of Website (In Shared/Business Web Hosting)
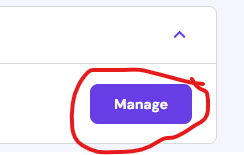
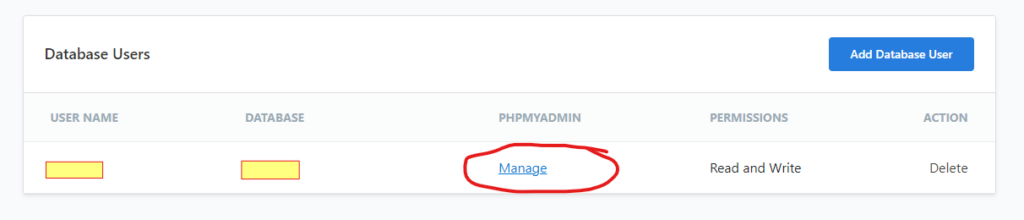
Now It’s time to login into Shared/Business Hosting
click on “manage”
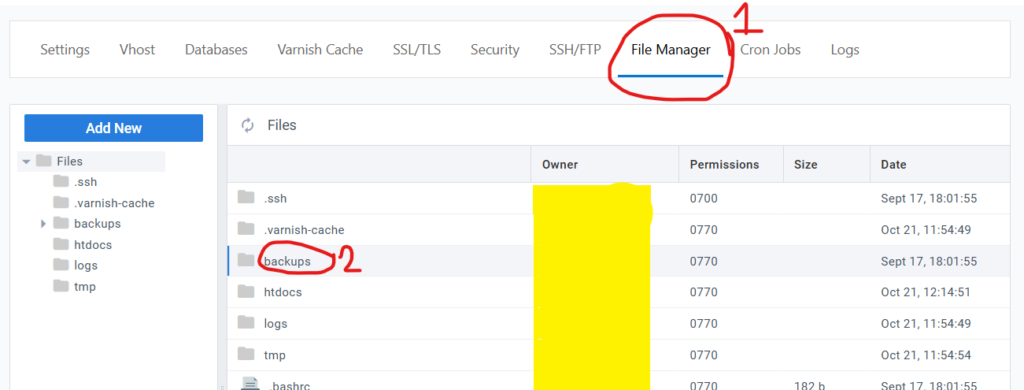
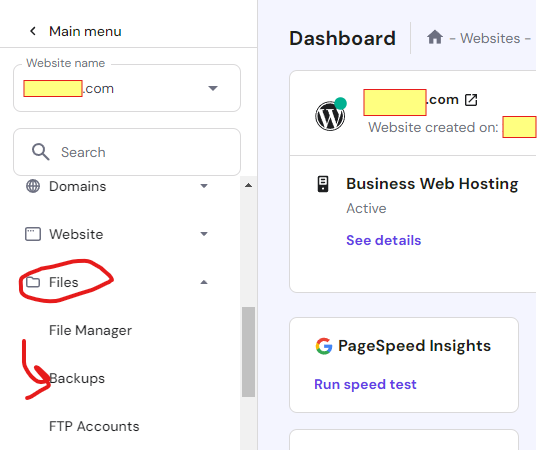
go to files > Backups
Take Backups of File
- click on Generate a new backup (Here, you will see an option to create a full backup of your website.)
- Wait for the backup process to complete. Wait until it’s ready.
- Download the backup
Note: It’s gonna take few minutes.
Take Backup of Database
To take backup of database, first be sure which database is your website’s real database.
to do so, go to Files > File Manager > Access Files of Mysite.com > public_html > wp_config.php (open this file)
Now scroll down a little bit, you will find DATABASE_NAME
For Example:
define( ‘DB_NAME’, ‘u738723dsjhswedsd’ );
“u738723dsjhswedsd” Now this is your database name. Now Take Backup of This Database Name.
go back to Files > Backups > Databases
and do Database Backup of it.
For Files (Alternatively)
Alternatively, you can also manually back up your files:
- Go to Files > File Manager in your Hostinger hPanel.
- Navigate to the directory where your WordPress files are stored (usually public_html).
- Select all files and compress them into a .zip file.
- Download the compressed .zip file to your local machine.
For Database (Alternatively)
- In hPanel, go to Databases > phpMyAdmin.
- Select the WordPress database you want to back up (this is usually named after your website).
- Once inside the database, click on the Export tab at the top of the page.
- Choose the Quick export method and make sure the format is set to SQL.
- Click on the Go button. This will download an .sql file of your database to your computer.
2. Delete the Website
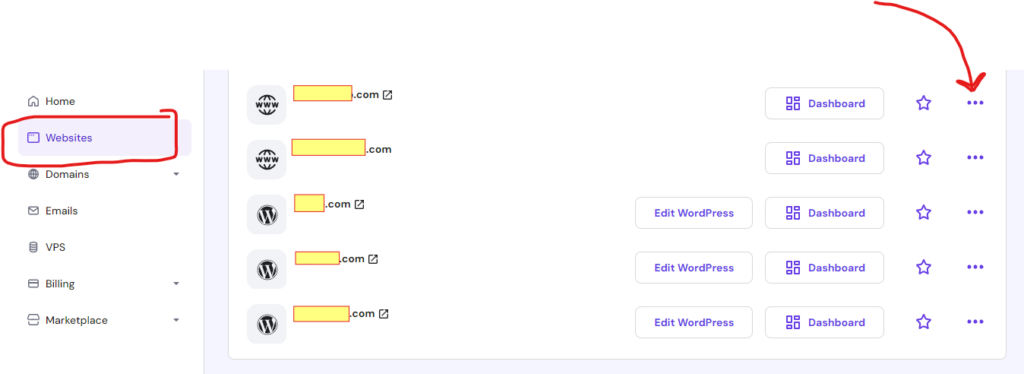
Open Dashboard of your Shared/ Business Web Hosting, go to Websites section > Click on three dots
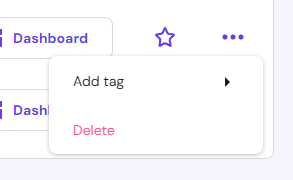
Now click on Delete
It will show you the following popup, simply click on tick button and Click Delete.
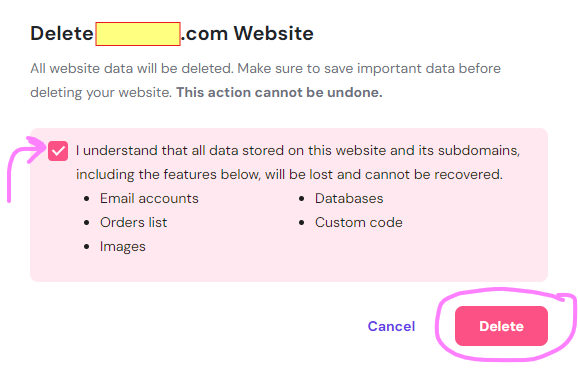
Your website has been successfully deleted from the Shared/ Business Web Hosting.
3. Setup Your VPS Environment (In VPS Hosting)
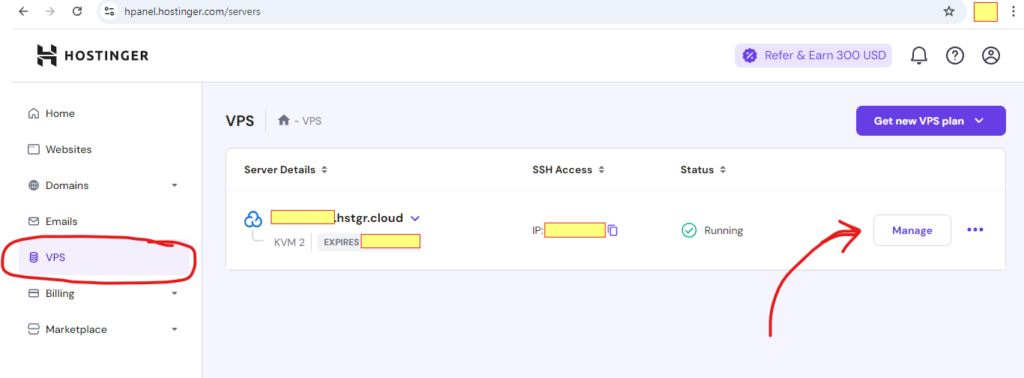
Step 1: Access Your VPS Control Panel
- Log in to your Hostinger account.
- From the dashboard, navigate to the VPS section.
- Click “Manage” on your VPS plan to access the control panel.
Step 2: Choose your desired Operating System + Panel
This is typically the first step in setting up your VPS.
For operating system, I have choosed Ubuntu 24.04, we can also choose other OS like CentOS, AlmaLinux, etc.
For Panel, I have choosed CloudPanel, we can consider other Panels also.
4. Setup the CloudPanel
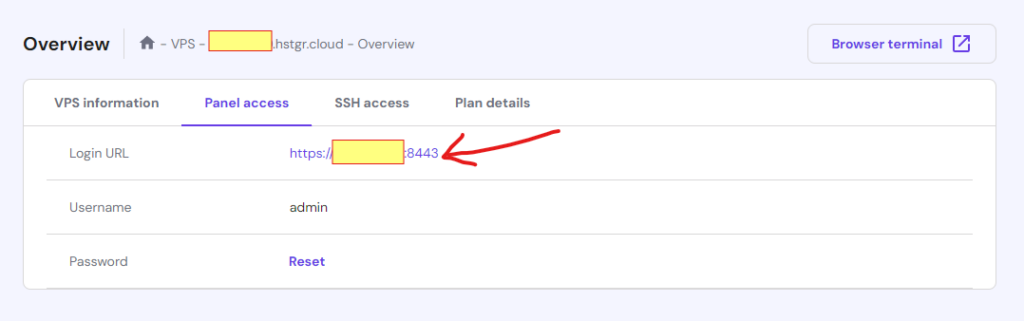
Login into the Hostinger VPS, go to VPS section > then click on Manage
Now go to panel access

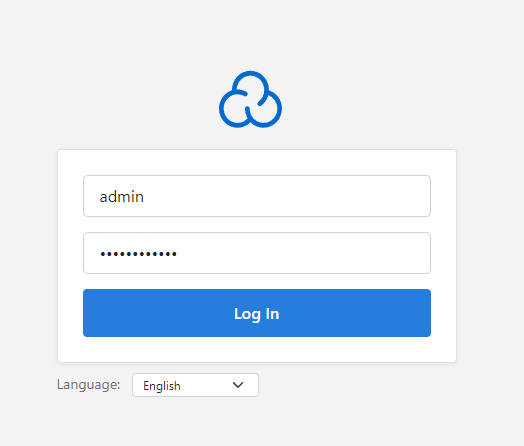
Open this link
<add some information here—–how to reset password for adding a new password———->
5. Add a New WordPress Site in CloudPanel
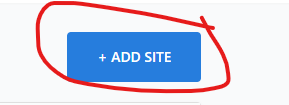
login into the cloudpanel
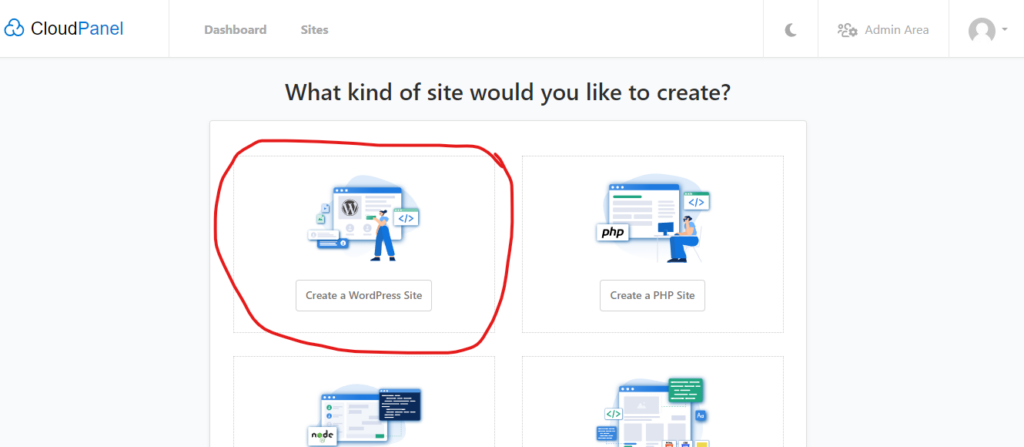
Now add a site
click on create a wordpress site
Now it will look like this. Fill these below data (if you feel lazy to add password, just click on generate new password)
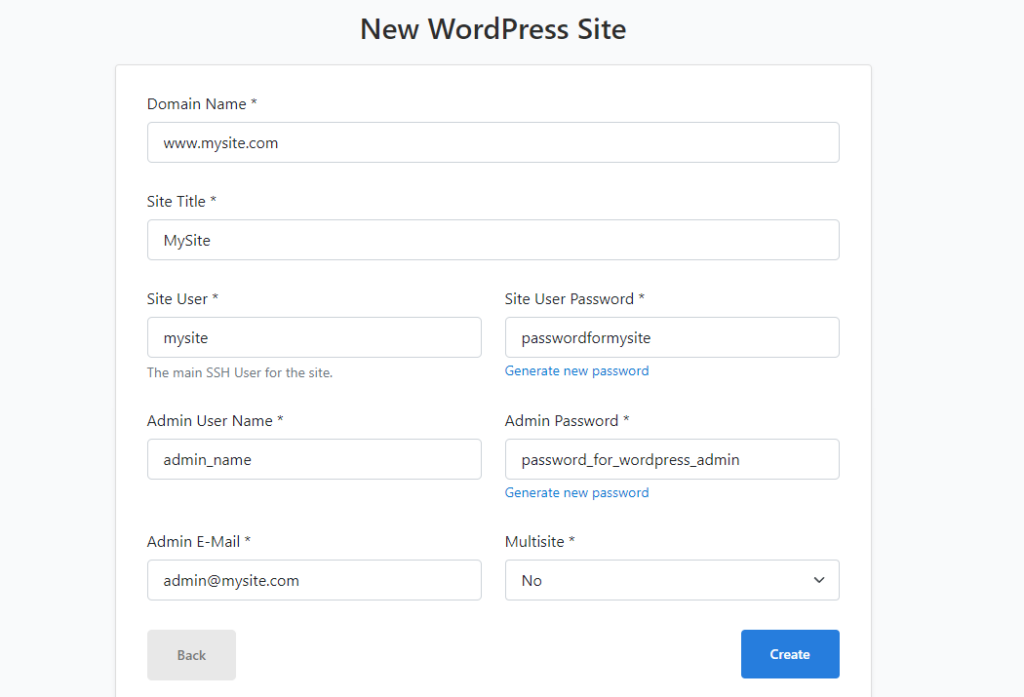
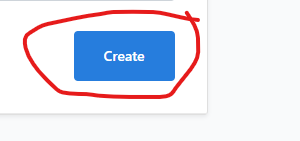
Now click on “create”
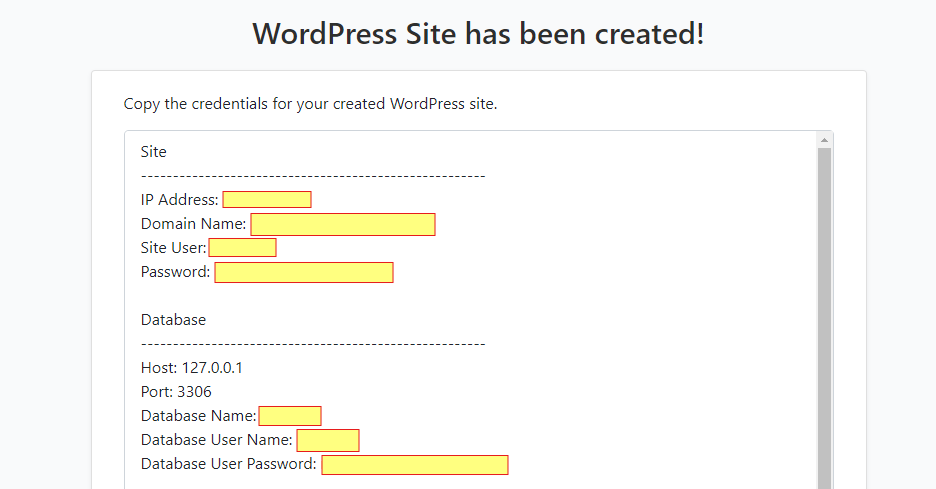
Hurray! Your WordPress Site Details has been successfully created
Now copy these details in a notepad or any text editor like MS-Word or Google Docs.
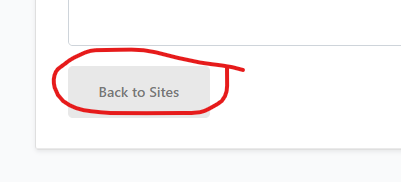
Click on “Back to Sites”
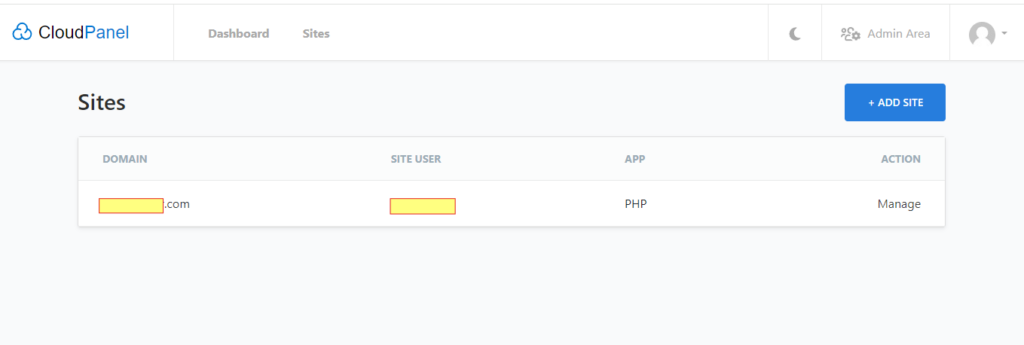
Your cloudpanel dashboard will look like this 🙂
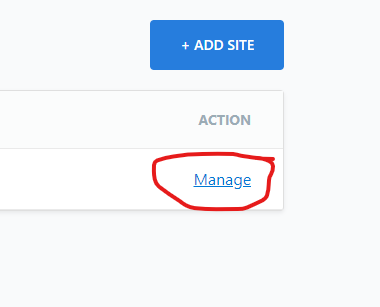
Now click on ‘Manage’
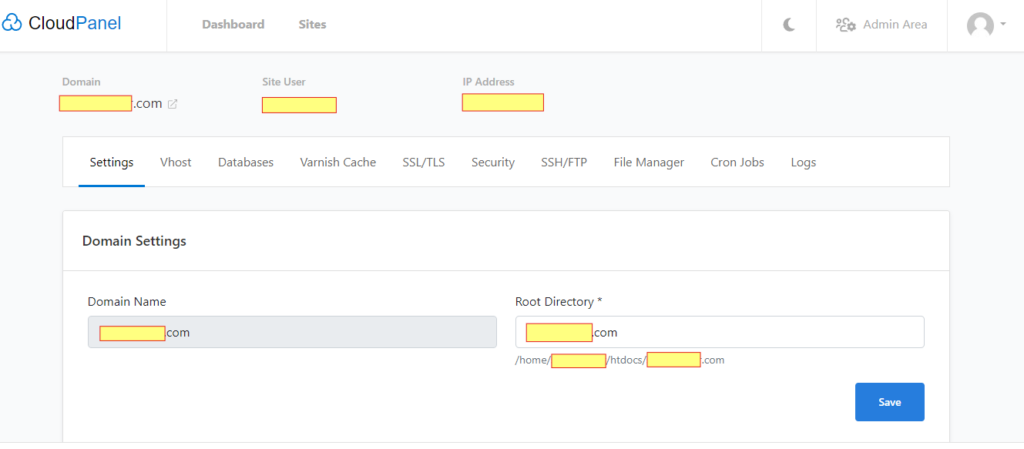
Now your site’s dashboard will loook this:
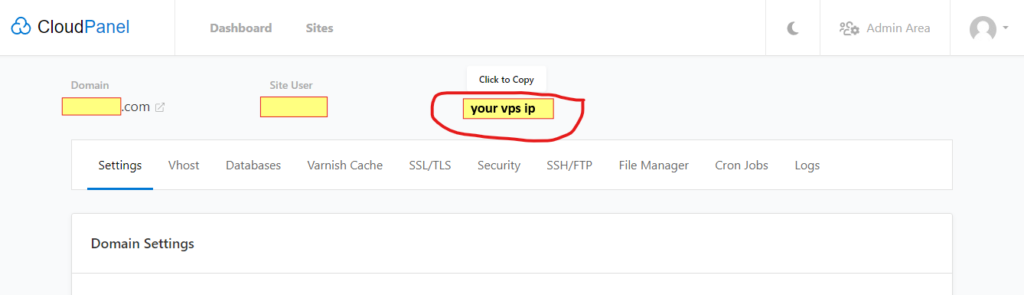
6. Make DNS Connection
Copy your vps ip from cloudpanel dashboard: just click on that vps ip, it will copied automatically.
Now
Open your domain registarar (Namecheap in my case), add two A records there pointing to VPS ip.
OR
If you have cloudflare connected to the Namecheap then, there is no need to change the 2 A records in Namecheap, you will have to add 2 A records in cloudflare.
7. Add a SSL
Make sure your domain is pointed to the vps hosting, then do this step.
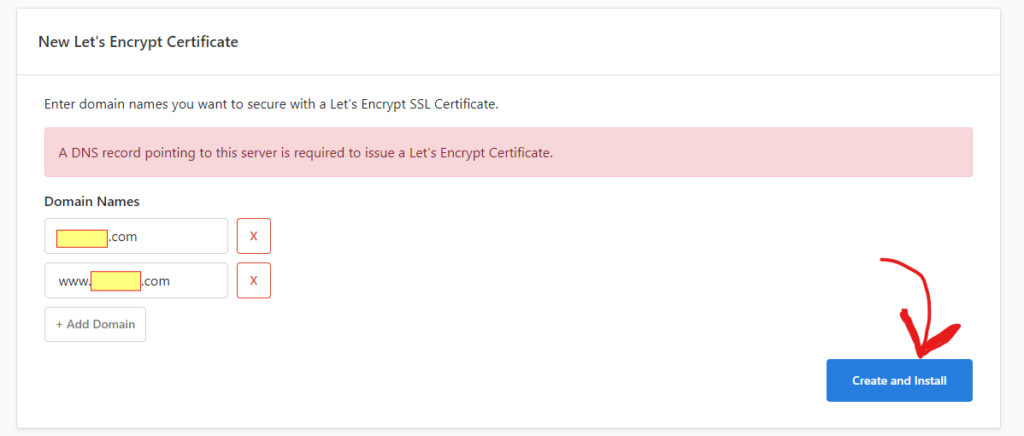
Inside Cloudpanel Website’s Dashboard, go to SSL/TLS Section > Actions > New Let’s Encrypt Certificate
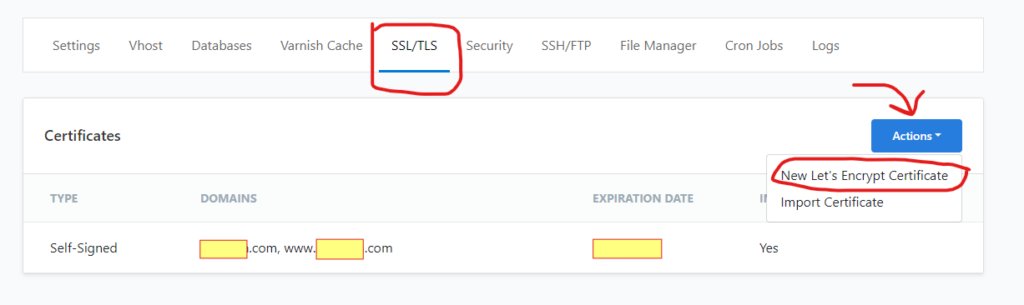
Then click on ‘Create and Install’
If you are not using cloudflare, then installation will be done successfully.
But if you are using cloudflare, you may get the following error.
Error: “Domain could not be validated, urn:ietf:params:[something]:error:unauthorized “, it means Your Cloudflare is providing SSL to your website.
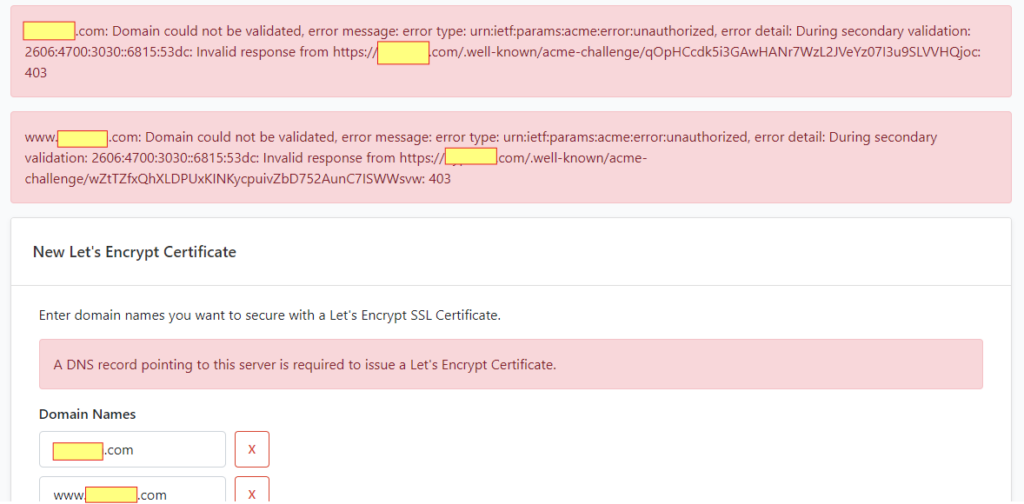
Now to fix this problem, open your Clouflare Dashboard, go to SSL/TLS section > click on Configure
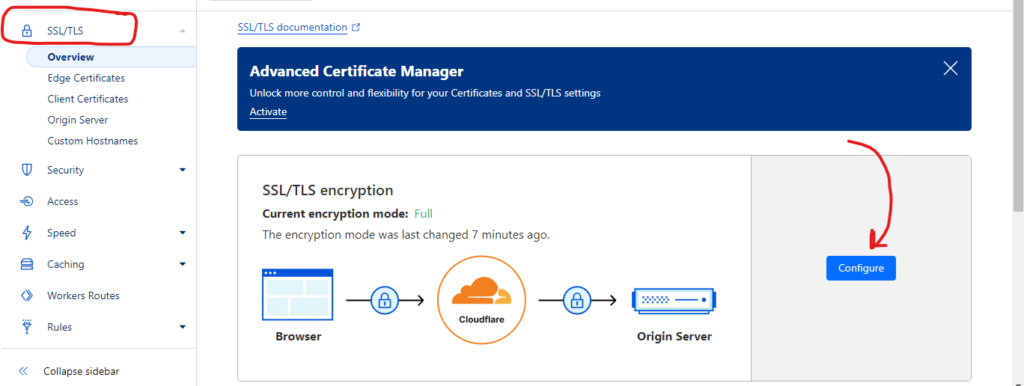
Now it will look like this
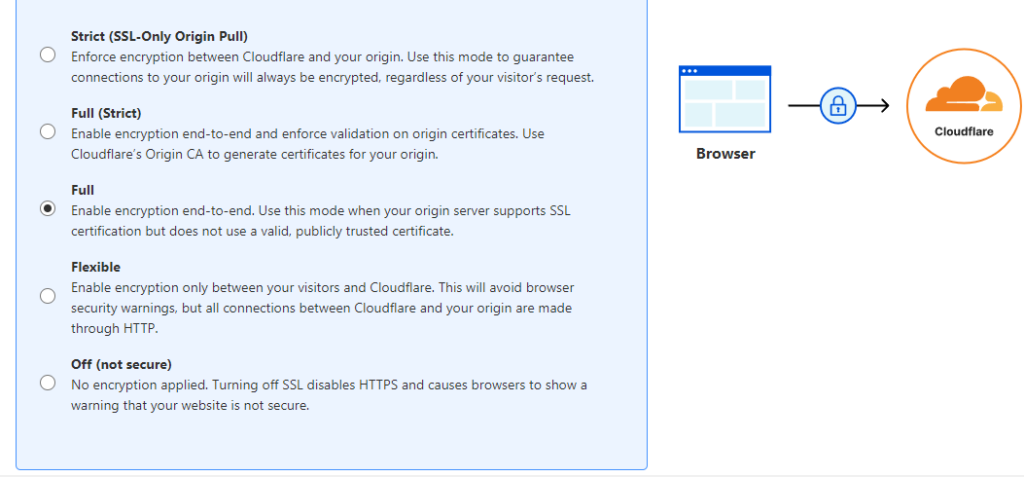
Listen Carefully, if the option is left default in Full, then change it to Flexible — check your website now, if it works, its successful.
If it doesn’t work, change it to Full (Strict) — check you website now, it will be 100% successful now.
8. A WordPress Sample will show on Website
Go to https://yoursite.com, it will now show a sample wordpress site.
We will learn about uploading the Files and Databases — then show our own wordpress site.
Note: If you get this error saying to “Install WordPress”, then simply fill out the information and install it.
9. Upload Files
Go to Cloudpanel dashboard > File Manager section
Click on Add New > then click on Upload file
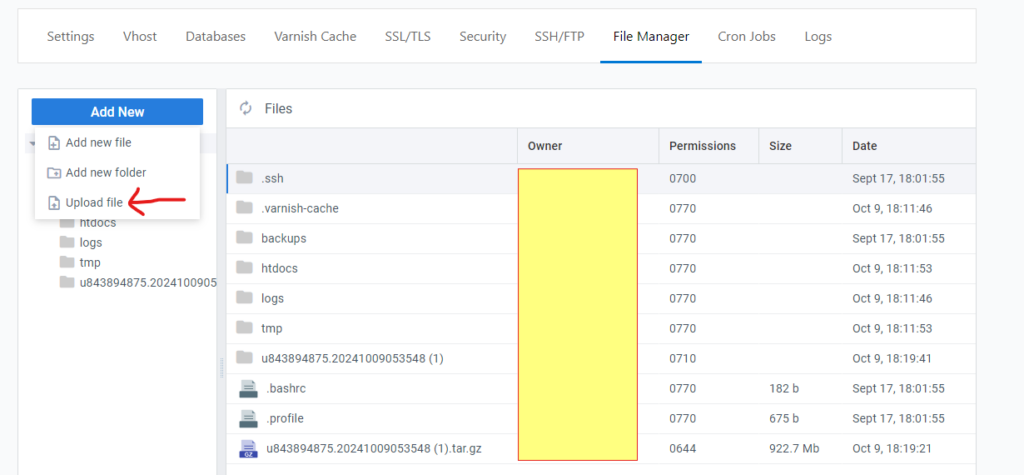
The file will be uploaded like this

Extract the file by right mouse clicking on it. Then click Extract.
Your extracted folder will look like this:

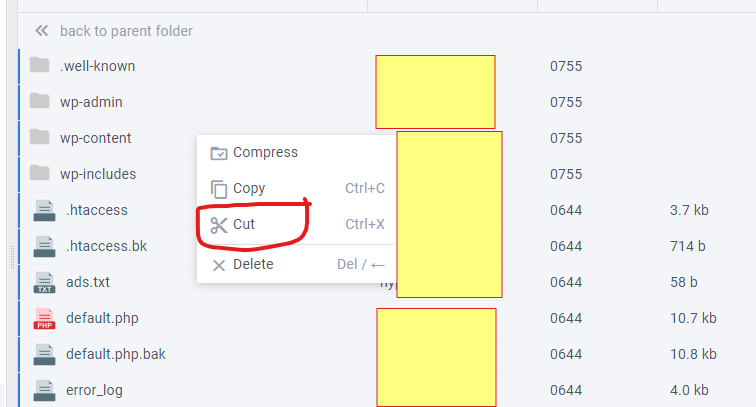
Open the file > go inside public_html folder
Select all by pressing Ctrl + A and then click Cut
After that, Click on Files, you will get to root folder (that is File Manager section)
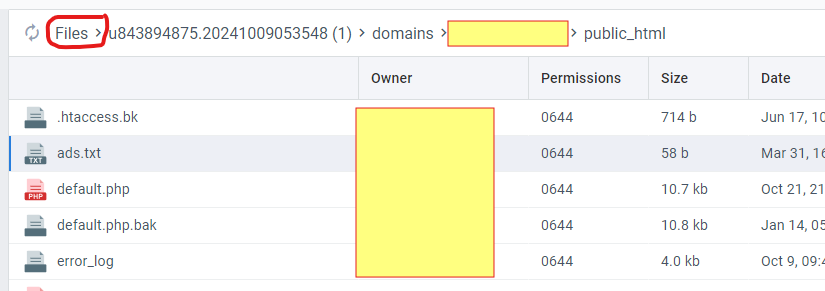
Now Go to htdocs > www.[mysite].com
- Select all and delete them
- Then Right Mouse Click and Paste the files
10. Upload Database
Go to Cloudpanel dashboard > Databases
Scroll down a little bit
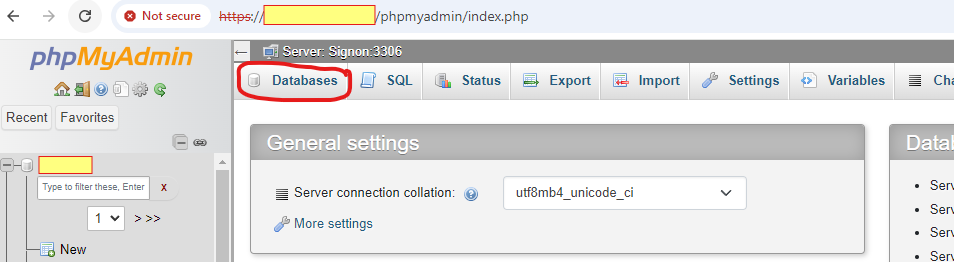
Click on Manage, it will open phpmyadmin panel
Click on Databases
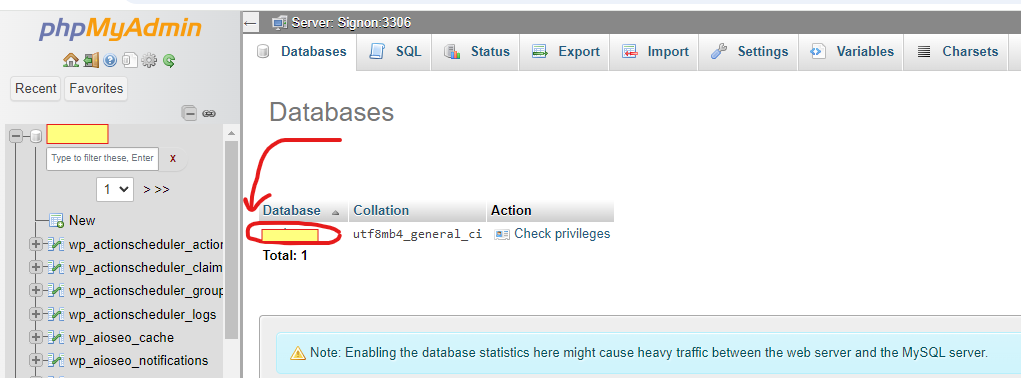
Click on your Database
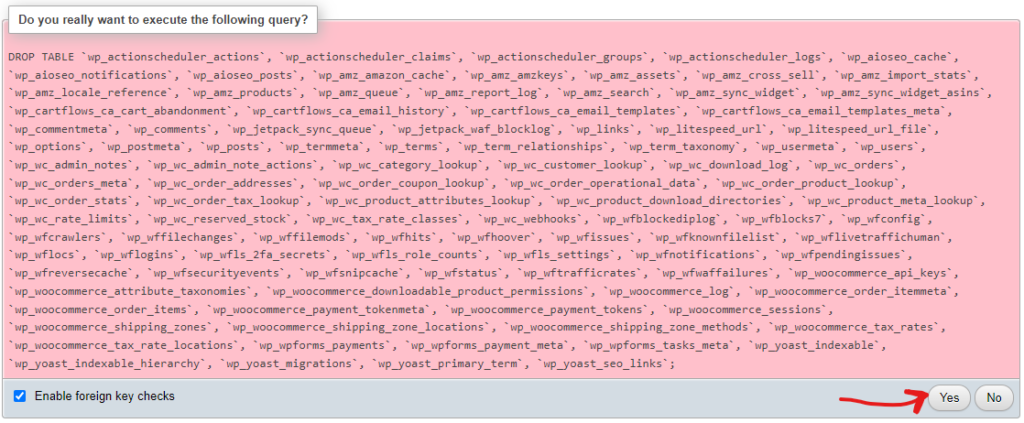
Scroll down a little bit, click on Check all, then select Drop
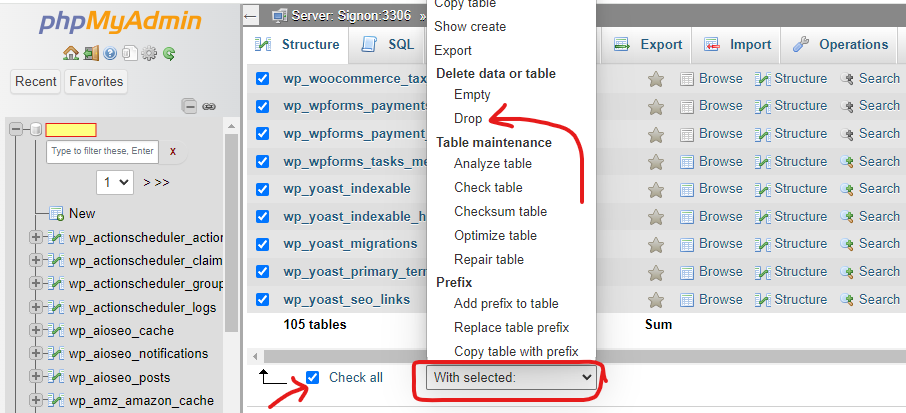
Now click on Yes
Now click on Import Tab > Click on Choose file

Scroll down after choosing the file — Now click on Import
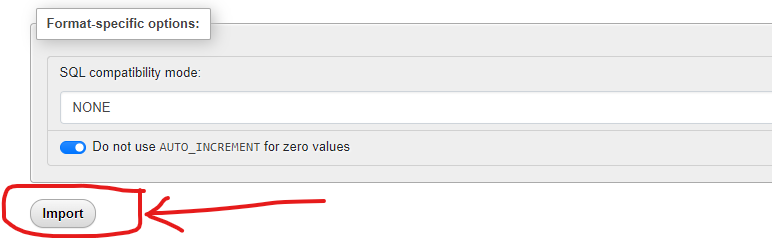
You will get a message “Your data has been successfully imported”.
If you want to a add a new database, not use the already given database, then follow these steps:
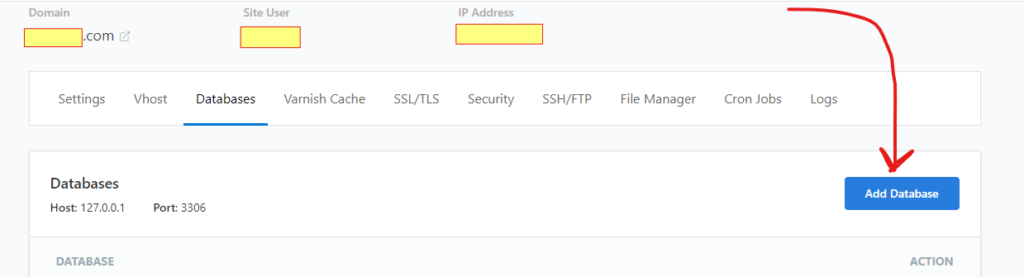
Go to Cloudpanel dashboard > Databases > Add Database
You will get this, now add the database’s name, username, and user password. Store these details safely in notepad or any text editor, it will be useful later.
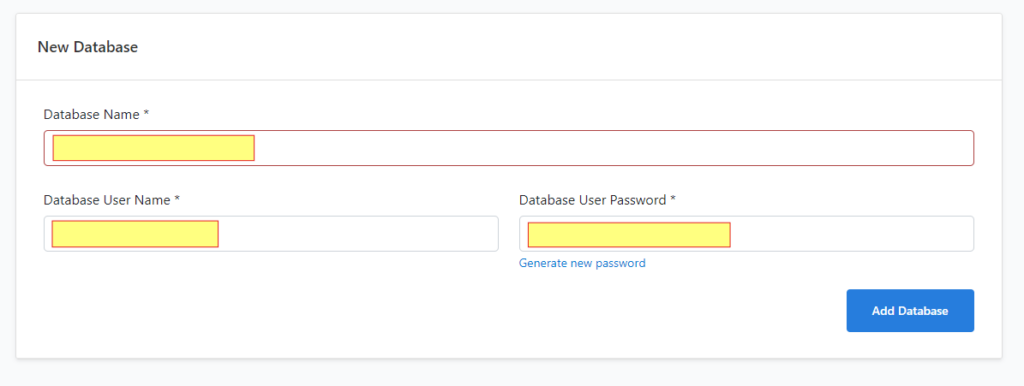
Click on Add Database
And Do the steps above mentioned.
11. Make Connection with Database
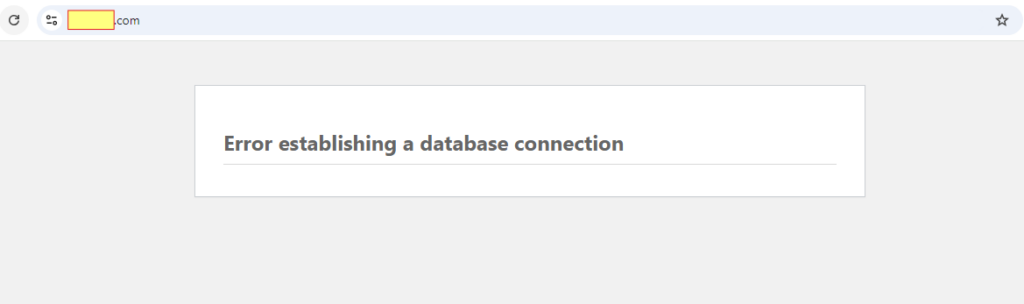
After doing above steps, you will get this error saying “Error establishing a database connection”.
Go to Cloudpanel dashboard > File Manager > htdocs > www.mysite.com > wp-config.php (open this file)
Now put the Details of Database’s Name, User, and Password which you had stored safely.

Hurray! Your website is live now!
Celebrate this Great Moment : )
Final Step: HOW TO SETUP EMAILS?
Do as of what-what has been said in this video step by step:
We are using WP Mail SMTP plugin for sending emails in our wordpress website.
(ERROR CAME) Access blocked: wpmailsmtp.com has not completed the Google verification process
PROBLEM:
Access blocked: wpmailsmtp.com has not completed the Google verification process. The app is currently being tested, and can only be accessed by developer-approved testers. If you think you should have access, contact the developer.
If you are a developer of wpmailsmtp.com, see error details.
Error 403: access_denied
SOLUTION:
Do the following:
- Within your Google Console (https://console.cloud.google.com/apis) project, please head over to the OAuth Consent screen section and then publish your app.
- Back in your WordPress admin area, you’ll need to connect to your Google account again by heading over to WP Mail SMTP > Settings and clicking on the button labeled Allow plugin to send emails using your Google account (https://a.supportally.com/FCADBa).
If the issue is still occurring, then it’s best to re-perform the Google mailer setup steps outlined in this documentation.
To confirm this isn’t a mailer specific issue, you may also try setting up another mailer by following the instructions outlined in this section of our documentation.
Take Backup of VPS WordPress Site
We will take here backup of WordPress Database and WordPress Files.
Note: Cloudpanel stores backup of WordPress Database everyday, so we can download the latest backup : )
Do this
- Open Cloudpanel
- Open your WordPress Site by clicking on Manage
- go to File Manager