

- Benefits
- REPLACE REACT WITH NEXT JS
- Installation
- Run it
- Project Structure
- Note: page.jsx & layout.jsx (app.jsx & main.jsx) (root level ' / ' )
- TRICKS
- Data Fetching
- Caching
- Form Handling
- Props
- State
- Server Components vs Client Components
- API ROUTES
- ERROR DIARY:
- QUESTIONS
- Insights came in my Mind
- [?] Why Tailwindcss is not working in NextJS?
Benefits
- File Based Routing
- data fetching
- redux
- Auto Image Optimizing
- Server-side Rendering (SSR)
- Client-side Rendering (CSR)
- Static Site Generation (SSG)
- seo title and meta description
REPLACE REACT WITH NEXT JS
- props, state
- hooks
- redux
- axios
- react router dom [Next Js Routing] {own file based routing system}
- serve correctly sized images (on demand image resizing)
- seo title, meta description, image alt name
Installation
(in shortcut)
npx create-next-appnpx create-next-app@latest <project-name>What is your project named? website-testing-name
Would you like to use TypeScript? No / Yes
Would you like to use ESLint? No / Yes
Would you like to use Tailwind CSS? No / Yes
Would you like to use src/ directory? No / Yes
Would you like to use App Router? (recommended) No / Yes
Would you like to customize the default import alias (@/)? No / Yes What import alias would you like configured? @/What is your project named? my-app
Run it
Open Terminal & Run Development Server
- Run npm run dev to start the development server.
- Visit http://localhost:3000 to view your application.
- Edit app/page.tsx (or pages/index.tsx) file and save it to see the updated result in your browser.
Project Structure
src/app
   page.js
   layout.js
   globals.css
Note: page.jsx & layout.jsx (app.jsx & main.jsx) (root level ‘ / ‘ )
TRICKS
ADD Favicon at browser top?
// Go to your Layout.js or Custom Layout Wrapper File.
inside <head>
<link rel=”icon” href=”dihho favicon.png”>
For E.g:
export default function Wrapper({ children }) {

return (
< >
  <html lang="en">

      <head>
        <meta charSet="UTF-8" />
        <meta name="viewport" content="width=device-width, initial-scale=1.0" />
        <link rel="icon" href="mywebsite-favicon.png" type="image/png" />
        <title>Makeup, Skincare, Fragrance, Hair & Beauty Products | Sephora</title>
      </head>

      <body>

        <header>.........</header>
        <main> {children} </main>
        <footer>.........</footer>

      </body>

  </html>
< / >
)

}
<meta charSet="UTF-8" />- //
Sets the character encoding to UTF-8, ensuring proper text rendering.
- //
<meta name="viewport" content="width=device-width, initial-scale=1.0" />- // Makes the page responsive on mobile devices.
How to show folders icons in vs code
Open VS Code,
go to File > Preferences > File icon theme > [Theme name] and choose your icon theme
install this “vscode-icons”
How to use ICONS in Next?
Just use ‘react icons’
use react icons library: https://react-icons.github.io/react-icons/
since Next is built on top of React, so we can use react icons library.
npm install react-iconsimport { CgShoppingCart } from "react-icons/cg"<CgShoppingCart className="w-[40px] h-[40px] text-4xl text-yellow-400 hover:text-yellow-600"/>
OR // <FaBeer style={{ fontSize: '50px', color: 'orange' }} />
Data Fetching
Server Components (Mostly Used)
There is no need for ustate& useEffect Hooks. App Router uses the React Server Components (RSC) architecture — allowing us to fetch data using server components or client components. RSC architecture has direct access to server-side resources like file systems and databases, so its very beneficial to use them.
allows you to fetch data on the server and stream the built HTML to the client.
async function UsersPage() {
  const res = await fetch('https://my-api.com/data');
  const data = await res.json();

  return data;
}

export default async function MyComponent() {
  const data = await loadData();
  return <div>{data}</div>;
}
Client Side Fetching
This pattern is not just for Next.js, but for any React app.
axios.post('http://localhost:8006/purchase-complete', formData,{
       headers: {
         'Content-Type': 'application/json'
          }
        })
.then(response => {
  console.log('product added', response.data);
         })
.catch(error => {
  console.error('There was an error submitting the data!', error);
         });
        }
"use client";
import { useState, useEffect } from 'react';
export default function MyComponent() {
const [data, setData] = useState(null);
useEffect(() => {
fetch('https://my-api.com/data')
.then(res => res.json())
.then(setData);
}, []);
return <div>{data}</div>;
}Caching
Form Handling
Props
Basic Props (same as React)
Props work almost identically in Next.js as in React because Next.js is built on top of React.
Get Server Side Props (for server-side rendering (SSR)) (at build time)
getServerSideProps
preload data from the server (SSR) and inject it into props
FETCHING + PROPS PROVIDING
(fetching data from a url and passing as props)
Get Static Props (for static site generation (SSG)) (at request time)
getStaticProps
preload data from the server (SSR) and inject it into props
per page (getInitialProps)
State
State works exactly the same in Next.js as it does in React. It’s used to manage the internal data of a component and can be modified through hooks like useState.
State: Works the same as in React with useState, useReducer, etc. Next JS has not introduced anything new for it.
In short, Next.js extends React’s props system with tools like getStaticProps and getServerSideProps, but state management remains identical to React.
useState
same as react
'use client'

import {useState} from 'react'

function Checkout() {

    const [name, setName]=useState('')
    const [phone_number, setPhoneNumber]=useState('')
    const [email, setEmail]=useState('')
    const [address, setAddress]=useState('')
    const [province, setProvince] = useState('')
    const [city, setCity]=useState('')
    const [house_number, setHouseNumber]=useState('')
    const [landmark, setLandmark]=useState('')
    const [orderNotes, setOrderNotes]=useState('')
Server Components vs Client Components
(CSR) (client side rendering)

(SSR) (renders on server each time when a client makes request)
SSG (renders at build time when website is deployed)
ISR (hybrid of both SSR & SSG)
Styling
- CSS Modules
- Global Styles
- External Stylesheets
4. Tailwind CSS
5. CSS-in-JS
6. Sass
API ROUTES
Next. js allows the creation of API routes within the project, enabling developers to build backend functionality like data fetching, authentication, and more.
ERROR DIARY:
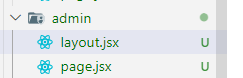
Error 1: The default export is not a React Component in page: “/admin”

Solution: Just delte your useless layout.jsx file
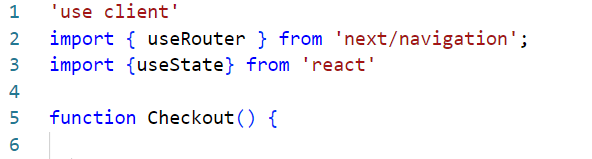
Error 2: You’re importing a component that needs useRouter
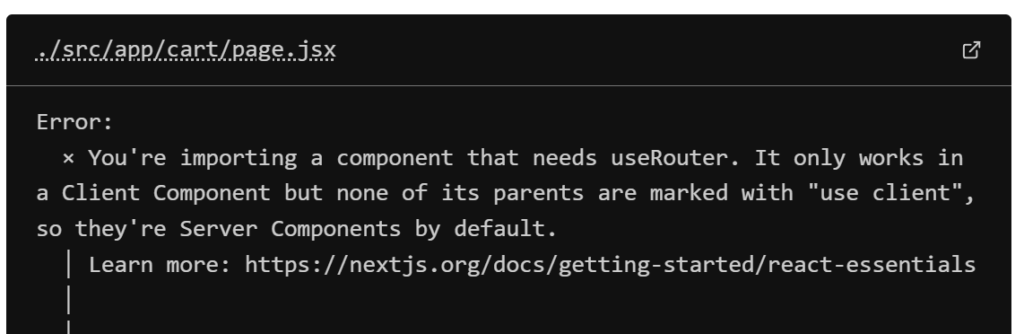
It’s client side because user will click on button, so put ‘use client’. Then it will be fixed.
Put like this:
QUESTIONS
Q1: How to know whether you are using App Router or Page router?
Just look at here, its saying app, so its App Router
Q2: What to put in meta title & description?

Give title about your website like this:
title: “Gadget Insider – Buy Gadgets at Best Prices”
Give description about your website like this:
description: “Explore the latest electronics and gadgets at unbeatable prices. Fast shipping and secure payments. Shop now for great deals!”
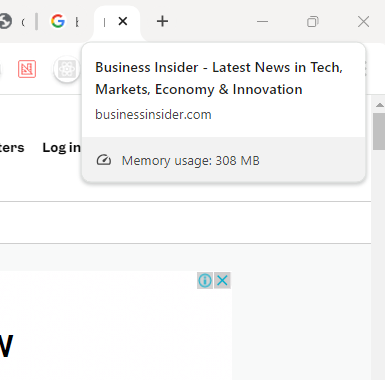
How to see meta title of a page?
To see meta title, hover the tab of website page
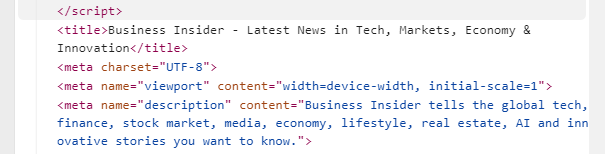
How to see meta description of a page?
To see meta description: right click > inspect > go to head section > scroll down > you will find description
Q3: How to comment in jsx?
use {/* */}
For Ex:
{/* Submit Button */}How to use redux in next?
// import { useSelector } from ‘react-redux’
// const hehe = useSelector((state) => state.product)
// const machine= useSelector((state) => state.machine.value)
Redux works almost the same in Next.js as it does in a regular React app. The main difference comes when you need server-side rendering (SSR) or hydration in Next.js.
React VS NextJS
| Aspect | React | Next.js |
|---|
| Redux Setup | Same: Provider in index.js | Provider in _app.js |
| State Usage | useSelector and useDispatch | Same: useSelector and useDispatch |
| SSR Support | Not required | Optional: Use with getServerSideProps |
| Hydration | Not needed | May need to handle state hydration for SSR |
How to fetch data in Next?
for hehe variable
let hehe=[]
How to use State (useState Hook) in Next?
Where to put Images, Videos file in NextJS?
- Use the public folder for static files you want to serve directly (e.g., videos, logos).
- Use Next.js <Image/> component for optimized image rendering.
Next.js has a special public folder where you can place images, videos, or other static assets. Any files placed here are directly accessible via a URL.
Place your files in the /public directory.
/public
  /images
    logo.png
  /videos
    intro.mp4
Access in Code:
<img src="/images/logo.png" alt="Logo" />
<video controls>
  <source src="/videos/intro.mp4" type="video/mp4" />
</video>
Note: Files are served as-is without additional processing.
How to insert images in Next which will be served optimized?
If you want to benefit from automatic image optimization, Next.js provides an component.
Note: If the public Folder Doesn’t Exist: Simply create a new folder named public at the root level of your project.
your-project/
├── node_modules/
├── public/          <-- Place your static assets here
│   └── images/
│       └── logo.png
├── src/
├── pages/
├── package.json
└── next.config.js
import Image from 'next/image';
export default function Home() {
return (
<div>
<h1>Welcome to my site</h1>
<Image
src="/images/logo.png"
alt="Logo"
width={200}
height={100}
/>
</div>
);
}Note: In Next.js, the component must always be self-closing (), because it doesn’t support children
<Image src="/example.jpg" alt="Example"> </Image>
 // ❌ Not allowed in Next.js
<Image src="/example.jpg" alt="Example" />
// ✅ Correct usage
How to know whether the image has been optimized or not?
# When opening the image in New Tab, it will open like this:
/_next/image?url=%2Fdone.gif&w=128&q=75w=128: Width of the image.q=75: Quality setting.
# Download the Image & compare the size with original image.
1. Inspect the Rendered Image in the Browser DevTools
- Open your site in the browser.
- Right-click the image and choose “Inspect” to open the DevTools.
- In the Elements tab, look for the
<img>tag inside the<Image />component.You should see the following indicators:- The
srcattribute will point to a dynamically generated URL such as:arduinoCopy code/_next/image?url=%2Fimages%2Flogo.png&w=640&q=75 - This URL indicates that the image is being processed by Next.js for dynamic resizing and quality adjustments.
- The
2. Check Network Tab for Image Size and Lazy Loading
- Go to the Network tab in DevTools.
- Filter by “Img” to see only the image requests.
- Reload the page and check the following:
- File Path: The requested image should be served from
/public/imagesbut accessed through a path like:arduinoCopy code/_next/image?url=%2Fimages%2Flogo.png&w=640&q=75 - Size: The image size will be smaller than the original if Next.js optimization is working (adjusted for the
widthandheightprops you set). - Lazy Loading: If the image is not immediately in the viewport, it won’t load until you scroll to it (indicating lazy loading is working).
- File Path: The requested image should be served from
3. Check the DOM for loading="lazy" Attribute
The <Image /> component uses lazy loading by default. To verify:
- In the Elements tab, find your
<img>tag. - Look for:htmlCopy code
<img src="/_next/image?..." loading="lazy" ... />
4. Verify Quality Parameter (q)
In the Network tab, look for the image URL query string:
- The query will include a
qparameter, which controls the image quality (default is75). Example:arduinoCopy code/_next/image?url=%2Fimages%2Flogo.png&w=640&q=75
5. Use Lighthouse for Performance Auditing
- In Chrome DevTools, open the Lighthouse tab.
- Run an audit with the “Performance” category checked.
- Look for:
- Properly Sized Images: Images should be optimized to fit their displayed size.
- Efficient Image Formats: Next.js may convert your images to modern formats like WebP where possible.
How to change the quality setting of optimized image?
  <Image
    src="/images/logo.png" // Path relative to the 'public' folder
    alt="Logo"
    width={200}
    height={100}
    quality={80} // Set quality to 80
  />
Default Value: If you do not specify the quality prop, Next.js uses a default value of 75.
How to change the format of optimized image?
1. Using Supported Image Formats
To have Next.js automatically serve images in different formats (like WebP) when possible, you typically need to provide the image in a common format (like JPEG, PNG, etc.) in your project, and Next.js will handle the conversion based on the request.
- Supported Formats:
- JPEG
- PNG
- GIF
- SVG
- WEBP (if the source image is in a supported format)
2. Manually Specifying the Format
If you want to ensure that an image is served in a specific format, you can change the file extension in the src attribute of the <Image /> component.
- Example: Using a WebP image if available
import Image from 'next/image';

export default function Home() {
  return (
    <div>
      <h1>Welcome to My Site</h1>
      <Image
        src="/images/logo.webp" // Use WebP format
        alt="Logo"
        width={200}
        height={100}
        quality={80} // Set quality as desired
      />
    </div>
  );
}
3. Using the next.config.js File
To enable support for serving images in modern formats, you can customize your next.config.js to allow Next.js to optimize images properly.
- Example Configuration:
// next.config.js
module.exports = {
  images: {
    // Allow specific domains for external images (if any)
    domains: ['example.com'],
    // replace with your domains

    formats: ['image/avif', 'image/webp'],
    // Enable AVIF and WebP
  },
};
How to Check the Output Format
- Inspect Element: After implementing the image, right-click and inspect the image element in your browser to see the
srcURL. - Network Tab: Check the Network tab in the browser’s developer tools while refreshing the page. The
Responseheader of the image will show the actual format being served.
Note on Browser Support
- Modern browsers typically support WebP and AVIF. If the browser does not support these formats, Next.js will fall back to the original image format.
- It’s a good idea to provide fallback formats (like JPEG or PNG) for compatibility with older browsers.
Summary
- Next.js serves images in formats like WebP automatically if the browser supports it, based on the original image file you provide.
- You can specify the format by changing the file extension in the
srcattribute or by configuring thenext.config.jsfile for specific formats. - Always check the image’s actual format using browser DevTools to ensure that optimizations are working as expected.
How to insert Videos in Next?
Insights came in my Mind
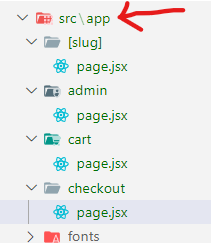
#1 : all folders in App Router are URLS
these folders: they all are urls
- /:slug
- /admin
- /cart
- /checkout
#2 when to use ‘use client’
wherever user does any work then use ‘use client’
for ex: clicking a button, filling up data, when using react hooks like useState, useEffect
[?] Why Tailwindcss is not working in NextJS?
If tailwindcss is working in all files but not working in only one specific file, then it means you had first created file with different name and its now different name.
For ex: you created header.jsx but renamed to Header.jsx, that’s why this error came
Solution: Change the filename from Header.jsx to header.jsx
More potential reasons:
- you haven’t specified path in tailwind.config.js
- module.exports = {
- content: [
- “./src/pages/**/*.{js,ts,jsx,tsx,mdx}”,
- “./src/components/**/*.{js,ts,jsx,tsx,mdx}”,
- “./src/app/**/*.{js,ts,jsx,tsx,mdx}”,
- ],
- you haven’t imported these in globals.css
- @tailwind base;
- @tailwind components;
- @tailwind utilities;
- you haven’t imported globals.css properly in your desired file
- import “./globals.css”;
")


