This is about the Ring Solar Panel.
Do you know, how to install ring solar panel step-by-step ???
So if you want to know this, then you’ve come to the right place.
Let’s jump right in !
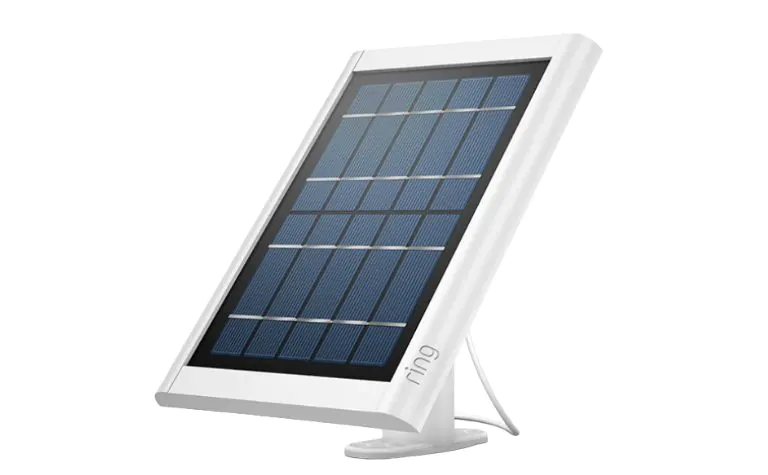
Ring Solar Panel
This solar panel is weatherproof and keeps the Stick Up Cam and Spotlight Cam fully charged by placing (mounting) them outdoors connecting through 13 foot micro-USB cable.
After getting few hours of sunlight, this solar panel makes your Stick Up Cam fully charged.
How to install the Ring Solar Panel Step-by-Step?
This is about the Ring Solar Panel setup.
Ring Solar Panel is especially designed for charging the battery of Spotlight Cam. We can also be sure that the battery is charged after few hours of exposure of direct sunlight.
If you have a Spotlight Cam, then you would need a solar panel for charging its battery because its battery will drian if you don’t provide it with constant power.
You would also need a ring solar panel connector (adapter) that helps you to connect the solar panel to your Spotlight Cam.
step 1: choosing location
Choose a nice location where the ring solar panel could get good exposure of the direct sunlight. Also, make sure to keep your solar panel near the Spotlight Cam. Then, the solar panel will now keep your Spotlight Cam Battery charged within few hours of direct sunlight per day.
step 2: installation
use the mounting arm as a template to point out the point at which you need to set up the ring solar panel.
Wall Installation: If you are installing it on the wall, then mark the point of two mounting holes with pencil.
Hard Surface Installation: If you are installing on the hard surfaces such as brick or stucco, then use the included drill bit to pre-drill the two mounting holes on that template. Now, install the wall anchors into the holes they should simply push in but you can hammer them in neccessary.
Soft Surface Installation: If you are installing on the soft surfaces such as wood, then you can skip this installing wall anchors and making holes through hammer.
Now, its the time to use the screws for securing the mounting arm, tighten it until it will not be tighten more, then slide your solar panel to the mounting arm. Also, make sure it is seated securely because that’s the support for holding the solar panel onto the mounting arm.
Step 4: Making Adjustment
So, what can you do for the better sun adjustment?
For having the better sun adjustment, you just have to loosen the adjustment screw present on the mounting arm. Until you get your desired angle, keep making the adjustment. Then, retighten the screw once the ring solar panel has been installed properly.
Step 5: Opening Power Connector Hole
The thing you have to do is to open the hole of power connector on spotlight camp.
Now, you have to open the battery compartment and for this, you have to press the button of your spotlight cam.
After this, you just have to press the button on the back of spotlight cam and slide the mounting plate out of its slot and on the mounting plate, pop the rubber (this rubber is for weatherproofing purpose) present there out of its hole.
So, the time is to keep the things back at their position where they were at first. Now, slide the mounting plate into its slot on the back of Spotlight Cam.
Note: We can insert the mounting plate in any direction we want. When, you have to fix this at ceiling, so keep the spherical ball toward the top of Spotlight Cam.
Step 6: Plug the Charging Cable
Now, you just have to plug the charging cable of the solar panel into the power connector hole on spotlight camp. Then, secure the plug with screw.
Note: The hole that you’re seeing in the center of the mounting plate is for keeping the security screw there.
Step 7: The Final Fix
Finally, insert the spotlight cam into its mounting bracket set, then set the desired angle and tighten the adjustment screw.
Make sure to charge and insert the included battery into your spotlight camp.
So, that’s the final task to do for installing the ring solar panel.
Stick Up Cam
Stick Up Cam is used for having the outdoor security camera. It helps you to inform previously who came to visit your house like family members. It also helps to keep an eye on the strangers and provides you the security.
These are the cool features of the Stick Up Cam:
1# Infrared Night-Vision
It helps the Stick Up Cam to see what’s happening even in the dark. So, you an see and record video even in the full dark. It is the thermal imaging technology for capturing the infrared lights produced by heat-emitting objects. It works by detecting the heat emitted by the object.
2# Two-Way Audio
It is the feature that helps your family members to talk through this security camera in real-time. This is possible because this security camera has built-in microphone and speakers. This security camera also helps you save money by preventing you to purchase external microphone and speakers to enable two-way audio.
3# Cloud and Local Storage
It has cloud and local storage despite the paywall. The cloud storage helps the security camera “Stick Up Cam” to store the data online in the remote servers which are owned by someone else. The local storage helps the camera to store the data on the physcial storage devices like HDD (Hard Disk Drive), SSD (Solid State Drive) and other external devices like flash drives and pen drives.
4# Integration with Alexa
This is the cool feature because it helps to connect the cameras and doorbells with Amazon’s Alexa. This also helps you to control the security camera with voice or you can view it remotely using the Amazon Smart Device with a screen.